
Recently, I was updating my Pinterest account and noticed that Pinterest has an option/feature added in 2012 (long back) to verify your website. As the name suggests, this option will allow you to verify your website on your Pinterest profile. While doing that for my website, I thought to write a post to share my experience with others. In this post, I have shared 4 simple ways to verify website on Pinterest profile page.

Verify Your Website on Pinterest
To verify your website on Pinterest, visit your profile page, enter your website name in “Website” and then click on the Verify Website button. Once you click on that, it will show you this –
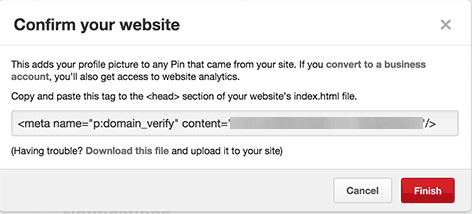
This is the Meta tag that you need to add on your website. I will show you exactly how you can achieve that later in this article. Right now, simply copy this information or you can also download the file HTML file too. (See the last line in the above image). Leave this window open and we will come back here again after adding Meta tag information to your website.
Things to do on your Website –
There are multiple ways you can add Meta tag information to your website. For your information, you need to add this piece of code in <head> portion or just before </head> tag.
Option 1: Upload index.html file to your website.
If your web host c-panel provide you a way to access server files online then just go there and browse public_html folder. Public_Html folder has your all the WordPress related files. Simply upload the HTML file that you have downloaded from Pinterest. Once you are done uploading the HTML file, go back to the Pinterest profile page which we kept open. Now click on “Verify Website”. If everything is done correctly then you will see something like this after your website name.

Option 2: If you are using a child theme.
The best way is to copy and paste the Meta tag to your Child header.php in <head> section before this tag </head>.
How to implement Option 2 for Genesis Framework –
If you are using the Genesis sample theme you might not see any file with name header.php in your child theme folder. But if you go and see the same file (header.php) in parent theme folder then you will be able to locate that file.
Cautionary Advice: Do not edit header.php in the parent theme.
Claim Your New WordPress Theme
What you can do is if you are using Genesis Framework –
Copy the header.php file from parent theme folder to Genesis child theme folder and modifies it as per your requirement. Once it is in child theme folder, you can then add Meta tag from Pinterest to <head> section and save it. Go back to the Pinterest profile page which we kept open. Now click on “Verify Website”. If everything is done correctly then you will see something like this after your website name.
If it doesn’t work then find the Genesis theme setting page. In setting page, you can specify some HTML/PHP below <Head> tag.
Option 3: Use Header/Footer WordPress Plugin.
Install “Insert Headers and Footers” plugin from WordPress plugin repository. “Insert Headers and Footers” is a simple plugin that will allow you add scripts for Google Analytics, Pinterest etc to your WordPress site without having you to code in complex places like the option 2. To use this plugin is self-explanatory and I don’t think to explain it in detail in this post.
On a high level, simply install and activate the plugin and visit Settings » Insert Headers & Footers page. Next, paste the Pinterest verification code in the headers section and save your changes. You now need to switch to the Pinterest verification code popup and click on the finish button. You will see a something like this.
Option 4: Jetpack by WordPress.com Plugin.
Jetpack is one of the best WordPress plugins which is used by millions of WordPress users across the globe. This plugin provides in total 28 awesome features that you can use to customize how your site looks and functions. These include Contact Forms, Tiled Photo Galleries, Custom CSS, Image Carousel, and a lot more. One of the features that we are interested here is –

Steps to follow to verify your website on Pinterest using Jetpack Plugin:
- Activate “Site Verification” feature of Jetpack if it is not yet active on your website.
- Click on ‘Configure’.
- Scroll down until you see this:
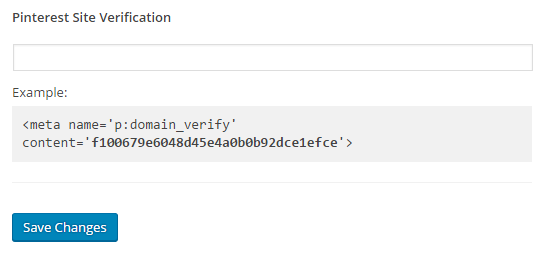
- Paste the Meta tag copied from Pinterest here and save your changes.
- You now need to switch to the Pinterest verification code popup and click on the finish button. You will see a something like this.
Option 4: Yoast SEO WordPress Plugin.
This is # 1 WordPress plugin to optimize your website for better SEO. This plugin provides tons of others feature but the one we are interested in is its social feature. If you don’t have it yet then you can install it from here – Download Yoast SEO
Once you install it, then you will something like this on the left-hand side of WordPress Panel. Click on SEO and it will expand like shown below –
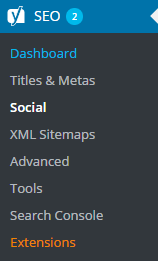
Now Click on Social & then Pinterest:
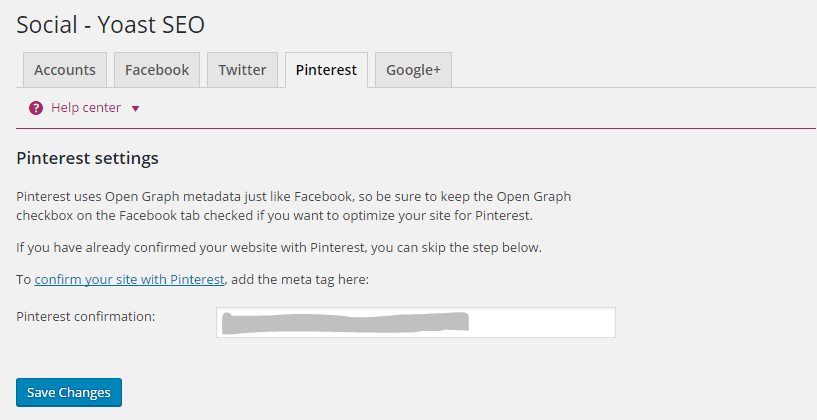
Click on ‘confirm your site with Pinterest” or enter the Meta tag information (only content) in the text box above(hidden area) and save changes.
You now need to switch to the Pinterest verification code popup and click on the finish button. You will see a something like this. This means your site is now verified and confirmed by Pinterest.
Error – API method not found
There are several other WordPress plugin available in WordPress plugin repository to accomplish this. While verifying digitalharpreet.com on Pinterest, I was facing some weird error called “API method not found” e. This error was coming on Pinterest when I was clicking on FINISH button on this pop –up.
I tried to find a solution for this problem but was not able to discover any concrete reason behind this error. Some people said that it could due to Plugin conflict. And to fix it, you may need to deactivate all the plugins first and then verify website on Pinterest.
And once verification is successfully done then activate plugins one by one to figure out which one was causing the problem. I don’t like this idea worth experimenting. Instead, I thought to try multiple options. And this is how I find out multiple ways to do this. In this post, I am just sharing 4 ways to verify your website on Pinterest which I believe should work for everyone.
If you like this article, don’t forget to check and follow DigitalHarpreet’s Pinterest Page. I hope this article helped you to verify your website on Pinterest.
If you liked this article, then please subscribe to my YouTube Channel for WordPress video tutorials. You can also find me on Twitter and Facebook.


Thank you for the post. Already done!