
Add Utility Bar Above the Header in Genesis Child Theme
Have you ever thought of adding utility bar above the header in Genesis Child Theme? In this tutorial, I will show you how you can do this on your blog in 3 easy steps.
See below image: Using this tutorial you will be able to add exactly the same utility bar on your website as shown below:

Just follow these steps and you will be able to add a full-width “Utility Bar” above the header in your Genesis child theme.

Shop Genesis Themes

Genesis Framework Live Demo
3 Steps to Add Utility Bar Above Header
There are basically three steps to create top utility bar above the header. Below are the steps that you would need to follow:
[icon name=”dot-circle-o” class=”” unprefixed_class=””] Register a new widget area.
[icon name=”dot-circle-o” class=”” unprefixed_class=””] Display Widget Area above the header.
[icon name=”dot-circle-o” class=”” unprefixed_class=””] Add Style to newly created widget area.
1. Register A New Widget Area to Genesis Child Theme
Registering a new widget area in genesis theme is very simple. Below is the sample code that you would need to add to your function.php file.
genesis_register_sidebar(array(
    'name' => 'Sidebar Name',
    'description' => 'Description',
    'id' => 'sidebar-id'
));
Parameters:
name – This is the name of your sidebar name.
id – Sidebar id – Must be all in lowercase, with no spaces.
description – Text description of what/where the sidebar is. Shown on widget management screen.
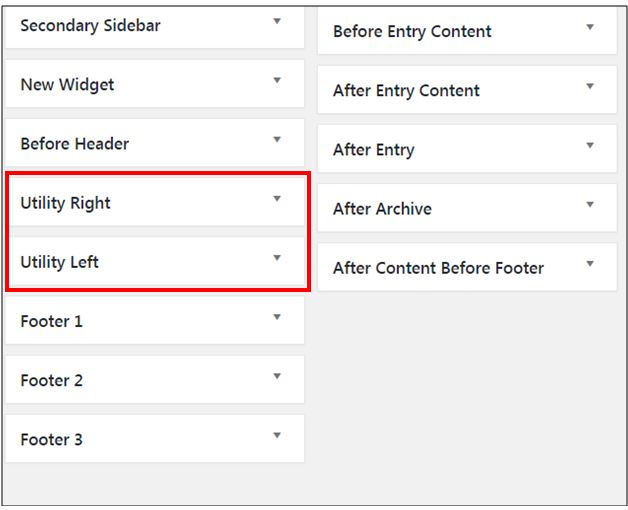
In our case, we will define two widget areas in genesis child theme. One will be Right Utility Bar and Left Utility bar. Below is the code that you will need to copy and paste into your function.php file to define two these two widget areas:
//*Genesis Utility Side Bar Registartion
genesis_register_sidebar(array(
    'name' => 'Utility Right',
    'description' => 'Utility Right Sidebar before header registration',
    'id' => 'utility-bar-right'
));

genesis_register_sidebar(array(
    'name' => 'Utility Left',
    'description' => 'Utility Left Sidebar before header registration',
    'id' => 'utility-bar-left'
));
Once you add the above code in your function.php file, you can go to Appearance > Widgets and you’ll see your new widget areas.
2. Display Widget Area above the header
Once you have a widget area defined in your genesis child theme, the next big thing that you need to do is to display it before the header. To do that you will need to add few lines of code in your function.php file.
Below is the code that you will need to add to your function.php file to display the utility bar everywhere on your WordPress site.
Here is the code:
//* Display Utility Bar Everywhere on your site

add_action( 'genesis_before_header', 'utility_bar' );

function utility_bar() {

	echo '<div class="utility-bar"><div class="wrap">';

	genesis_widget_area( 'utility-bar-left', array(
		'before' => '<div class="utility-bar-left">',
		'after' => '</div>',
	) );

	genesis_widget_area( 'utility-bar-right', array(
		'before' => '<div class="utility-bar-right">',
		'after' => '</div>',
	) );

	echo '</div></div>';

}
3. Add Style to newly created widget area
The last thing is to add some style to your newly added utility bar. Here is the CSS code to add style to the new Utility Bar widget areas.
Here’s what I’m using, but feel free to change up colors and fonts to suit your own needs:
/* Utility Bar
--------------------------------------------- */

.utility-bar {
	background-color: #000;
	border-bottom: 1px solid #ddd;
	color: #fff;
	font-size: 12px;
	font-size: 1.2rem;
	font-weight: bold;
	padding: 10px 0;
	padding: 1rem;
}

.utility-bar .wrap {
max-width: 1140px;
margin: auto;
}

.utility-bar a {
	color: #fff;
	font-weight: bold;
}

.utility-bar a:hover {
	text-decoration: underline;
	color: #ca2129;
	font-weight: bold;
}

.utility-bar-left,
.utility-bar-right {
	width: 50%;
}

.utility-bar-left p,
.utility-bar-right p {
	margin-bottom: 0;
}

.utility-bar-left {
	float: left;
	Text-align:left;
}

.utility-bar-right {
	float: right;
	text-align: right;
}

.utility-bar input[type="search"] {
	background: inherit;
	padding: 10px 0 0;
	padding: 1.0rem 0 0;
}
That’s it. Everything is in place now. Now is the time to add Widgets to the utility bars. Just for your information, this code should work perfectly fine for Genesis 2.0 and above.
Wondering How To Use It? Here are some ideas:
The top utility bar can be very useful for your if you would like to:
- Woocommerce Cart Total
- Account login/sign up
- Social Follow Links
- Website Search Box
- Custom Menu
If you like this tutorial, please share it on Facebook and Twitter. If you face any issues or need any kind of help in setting up utility bar on your Genesis Child WordPress theme then do let me know your issues in the comments section below.
Other Useful Genesis Tutorials – How to Customize Genesis Theme Archive Page Template


I have just started blogging and these are some great useful tips which i needed to learn..thanks for sharing
Glad you liked the article. Please let me know if you need any help.
Hi Harpreet,
Really cool post. Just what I was looking for. I wonder if you know how to add an utility bar right above the posts area in home-top or below the header. On my website, I added a responsive slider, and after that the slider is overlapping on the posts. Which is why, I want to add a utility bar right under the slider. If you have a little time, I would really appreciate it.
Thanks, David! Glad you liked the post.
I just checked out your website and Yes I can see that the slider is overlapping with the post area. The best & easy solution which you could try is to add some bottom padding to your website’s for this element area in the .css file. I don’t think you need a utility bar for that.
To add padding – GoTo your child theme .css file (Appearance – Editor – Genesis Child Theme)
Search for below code:
.soliloquy-container .soliloquy-wrapper,
.soliloquy-container .soliloquy-item {
width: 100%;
position: relative;
margin: 0;
padding: 0;
list-style: none !important; }
&
.soliloquy-container .soliloquy-wrap {
width: 100%;
position: relative;
margin: 0;
padding: 0;
list-style: none !important;
height: 100%;
zoom: 1;
*zoom: 1; }
Try changing the padding to this:
padding:0px 0px 40px 0px;
Increase or decrease the padding as per your requirement. Please let me know if this solves your issue.
Thanks again! Good Luck!
I added this to my site and unable to have it be on top of the header. it’s hidden behind it for some reason
The utility bar is there, but seems to be hiding behind my navigation. I am using new theme Monochromatic Pro. Any help would be great.
The bar is there, but seems to be hiding behind my navigation. I am using new theme Monochromatic Pro for Genesis. Is this a CSS problem or maybe something new with these themes?