Do you want to start a WordPress blog?
If so, then you’re are at the right place. I’m here to help you and answer your very basic to technical queries that every newbie bloggers ask when they get to start their first blog.
In this post, I will walk you through the basics of how to start a WordPress Blog. And if you are willing to take action and serious about starting a blog then it will hardly take 5 minutes. Yes, Believe me, you can make your dream blog up and running in a matter of 5 minutes.
[Tweet “Dream Big, Start Small, Begin Now!”]
Just FYI if you are not aware, WordPress is one of the world’s largest blogging platform. WordPress is also a complete content management system and is a great way to build many different types of websites. This post will show you how easy it can be to get your blog or website up and running quickly.
How to Start a Blog – Click Here to Start
Before we go deeper into what you need to do to start a WordPress Blog, I have listed down the steps that we need to take to make this happen.
- Choose A Blogging Platform
- Secure a domain name and get hosting from Bluehost.
- Configure your blog.
- Design your blog.
- Start creating useful content for the readers.
I’m hoping you have already done the homework on what exactly you’ll write in your blog. I mean, you already have chosen your Blog Niche, you know who will be your target readers & how you are planning to make money from the blog? If you need more support in getting answers to these questions, I suggest you read these articles first before moving further down.
- How to Choose Blog Niche?
- How to Make Money Blogging from Google Adsense?
- How to Make Money from a blog using Affiliate Marketing?
- How to drive traffic to a blog?
At this point, I am assuming that you’re ready to start a WordPress blog. I hope this step by step guide will help you to start your first blog. If you plan on starting a blog on Bluehost and you are interested in learning how to start a blog on WordPress, continue below. If you sign up for Bluehost, but you are confused for any reason (such as how to set it up, picking a plan, pricing, etc.), you can always send me an email and I can help you out. That’s what I’m here for so don’t be afraid to send me an email.
Click Here to Start A Blog – Quick Setup.
Step 1: Choose a Blogging Platform
Before you start, you’ll need to choose the blogging platform or the tool that helps to get your blog content on the web. I have already used multiple blogging platforms like Bloggers, Tumblr, Contentful, Medium etc. but the one that I like the most, infect the world like the most are the “WordPress.org”. I highly recommend using WordPress to start a blog because of its ease of use and availability of thousands of free Plugins to make your website look attractive.
Here are few solid reasons why WordPress is #1 choice of Bloggers/Website Owners –
- No Technical Knowledge is required to design your website as per your need. There are thousands of free and premium themes, plugins available in the market to do all the coding for you.
- The tool itself is FREE to use. It’s a content management software from WordPress which help you to organize your website stuff in a such a way that you can add/modify your content easily.
- The tool is there for many years and is reliable. It is a robust and secure system although you will need to keep it updated to maintain security.
- There is a whole industry of tool providers, designers, and developers for WordPress that will help you to customize your blog in many ways.
Available Platforms For WordPress Blog Setup
WordPress is powered by its parent company Automattic, which offers two variations of this popular blogging platform – WordPress.com and WordPress.org.
[Tweet “[Tip] WordPress.org which is popularly known as self-hosted WordPress blog.”]
WordPress.com
WordPress.com is a free blogging platform offered by Automattic, which let anyone to create a blog for free. When you create a blog on WordPress.com, you will get a web address like “Example.wordPress.com”. Your blog will be hosted on WordPress server, and this platform is perfect for those people, who want to have a blog for personal writing.
There are many paid add-ons that are also available which you can use to buy a custom domain name, you can use paid themes and so on. WordPress.com has many limitations in terms of managing your blog. For eg., you can’t install 3rd party Plugins and you have limited choices for themes.
From a personal blog perspective, this is not a bad option, as WordPress team takes care of managing your blog architect, and backup. But, if you plan to make money from your blog & create a future/career, ignore WordPress.com & use WordPress.org.
Here is an official TOS page for using WordPress.com blogs, which will give you all the information regarding fair usage and TOS of WordPress.
WordPress.org
WordPress.org is a complete solution for people like you & me who are looking to start a blog for making money, for promoting their small business or for any other usage like creating an E-commerce site. These days all web-hosting companies let you install WordPress on your hosted server and it’s just a single click process nowadays and very easy to follow.
WordPress.org removes all the limitations that are present in WordPress.com websites. In WordPress.org a.k.a. Self-hosted websites you can freely use all the available Plugins, 3rd party themes; you can monetize your content using Adsense, Affiliate Links, Paid Ads, and Paid Reviews. The self-hosted website provides you the flexibility to earn money using your owned website.
My recommendation is to go with WordPress.org – you’ll have a little more work in the initial phase (I’ll walk you through it below) but in the long run you’ll have full control over the look, feel, features and monetization of your site. It could end up cheaper for you too!
I know some of you probably be searching free options to start a blog but my advice to invest a little in WordPress.org blog is what probably you’re not looking to hear. Because there is a small cost associated with it – but I must tell you that you will be off in the long run and you’ll see later the expenses are not that much.
Step 2: Secure a Domain Name and Set Up Your Blog Hosting
I recommend Bluehost for getting both your domain name and hosting. Why I recommend Bluehost is because of these reasons –
- Bluehost provides FREE .COM domain for the first year or as long as you buy 12 months worth of Bluehost web hosting. Claim FREE domain name here.
- Bluehost is # 1 recommended web hosting from WordPress. WordPress is closely working with Bluehost to provide best web hosting platform since 2005.
- They have 24X7 customer support who are very friendly and supportive of taking care of all your needs, doesn’t matter what time you contact them. I personally had a great experience working with them and I definitely recommended anyone to be their customers.
- Bluehost provides you articles, tutorials, video-guided lessons to solve each and every small issue that you can face while hosting a website.
- 100% money back guarantee. No questions will be asked. If you don’t like their service then they will not hold your money with them. But it’s highly unlikely anyone does this when they have Bluehost as a web hosting. Their service is really good. Believe me.
- Bluehost provides technical support to all their customers in setting up your new website or if you want to migrate an already existing website from any other web host. They charge you little migration charge for all the hard work they do for your seamless transfer to Bluehost.
Choose a Domain Name
To start a blog the first thing that you will need is a domain name or a blog web address like www.digitalharpreet.com. The domain name will be your blog home address online. Do remember that domain name is the first thing that people will notice or see before they actually see what is in there. So for the sake of this article, I just want you to walk through – how to choose a domain name for your blog so that it provides maximum value to you in long run –
- Easy and Rememberable – The domain name should be easy to write, say, & remember.
- Describes Brand – It should be something that describes your brand by itself.
- SEO – Using right keyword when choosing domain name can rank you higher in Google and other search engines.
- Copyright & Trademark – Make sure you are not using anyone’s copyright and trademark while choosing a domain name for you.
These are some important factors that you should consider before purchasing the domain name. Note that domain name isn’t a super expensive thing to secure – but it will at least cost few every year. Now once you have a domain name, you are ready to purchase web hosting for your blog.
Step 3: Set Up Your Blog
Starting a WordPress blog on Bluehost is very easy. But first, it important to decide which one you are interested in i.e Bluehost India or Bluehost USA. Please read below to learn more.
Bluehost – India Vs. USIf you are from India and don’t want to make payment in US dollars then you can host your website to Bluehost India. Everyone else, I recommended buying hosting from Bluehost USA. Click Here To See The Package |
If you’ve gone with Bluehost as your domain and hosting provider selection, installing WordPress is super simple. In fact, Bluehost has created a simple video to show you exactly how to do it:
If you still have confusion, please follow below pictures to learn how to purchase web hosting from Bluehost. Type Bluehost.com in your browser and click on get started now –

Enter the domain name which you want to buy for your blog. Do remember that – if you choose new domain name then that will be FREE to you for next 12 months if you buy hosting for 12 months. I highly recommend making use of FREE domain from Bluehost instead of investing another 10 to 15 dollars or 100INR to 300INR in just purchasing a domain name from someone else.
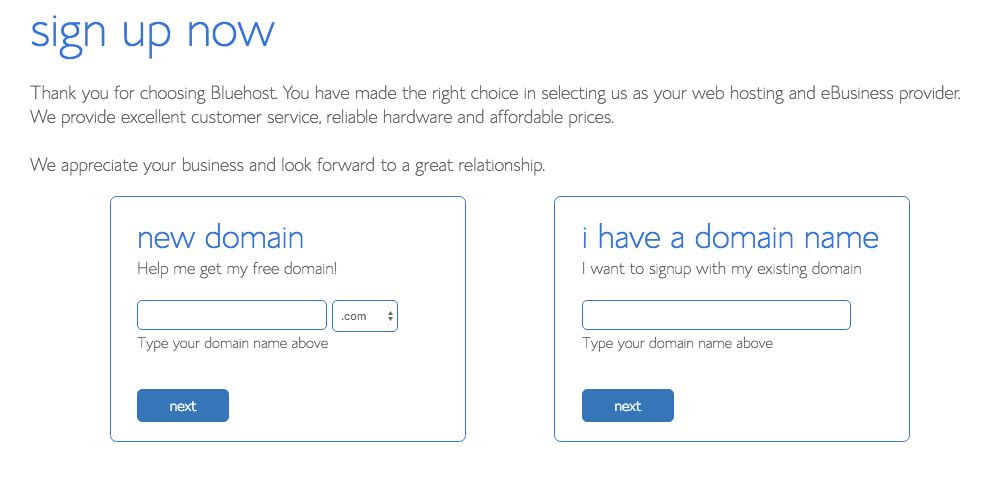
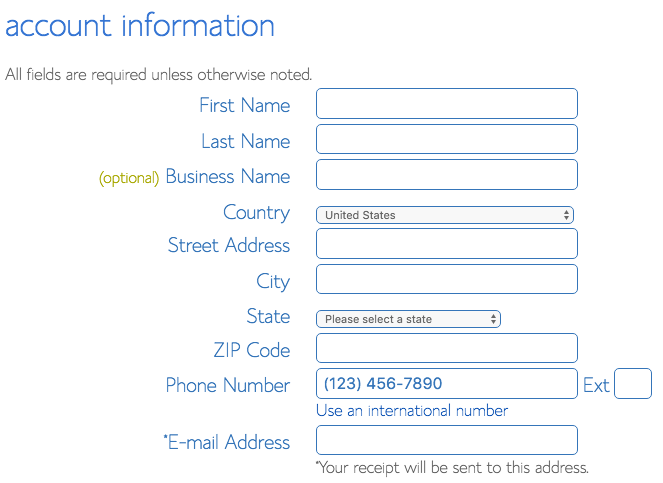
Next, enter your account details. Make sure you enter correct name, address, and phone number as it is very important for you and hosting company to have the right information on your account to avoid future cancellation. You can protect your personally identifiable information from other on the web by purchasing Whoisguard subscription for your domain name. This is something which you can setup later on so I will not go into much detail here in this post. If you have any questions regarding this, you can contact me anytime using the contact page.
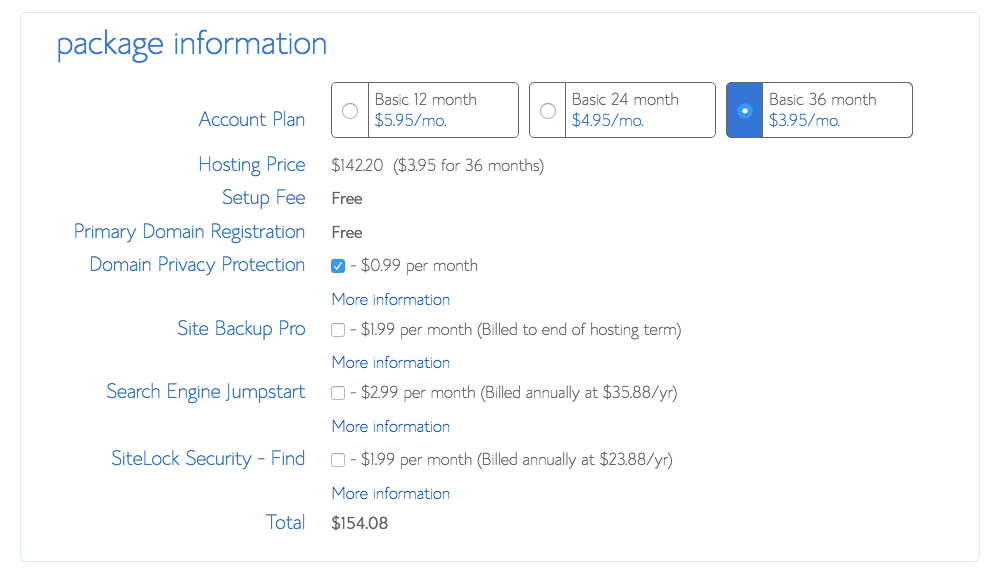
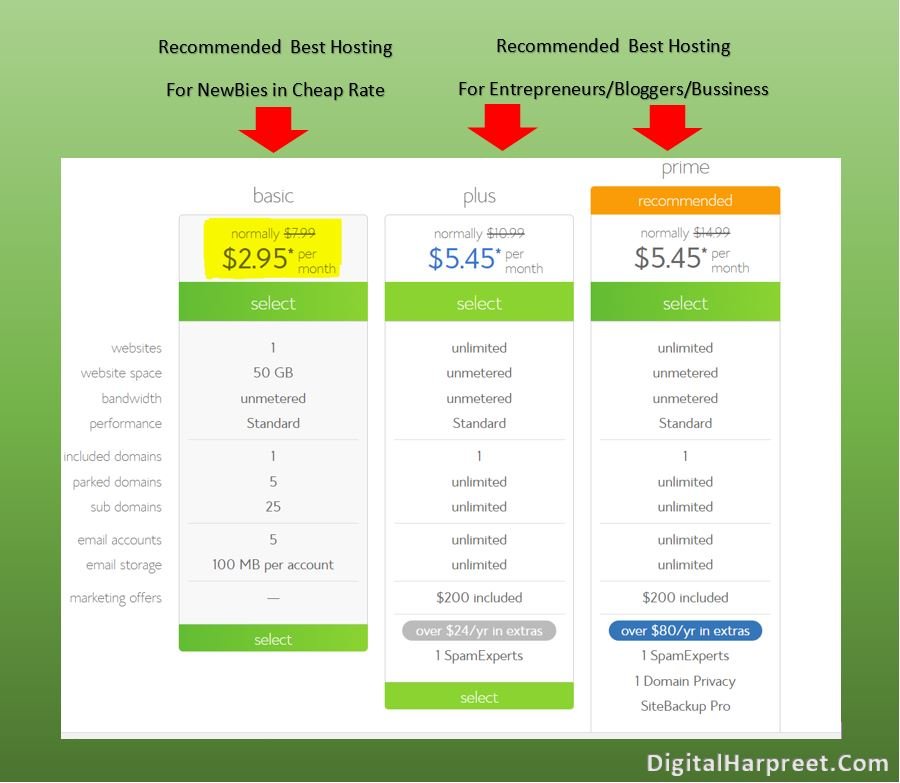
Now, Select a package what you think will suit your hosting needs. For full information about what is best for your – please download Offical Guide To WordPress Blog Setup. This guide will help you understand each and every bit of Starting a blog on Bluehost hosting. But, personally, if you ask what I would select – I would go with “Bluehost Plus Plan for 36 months term”. To know why? Please down this E-book.
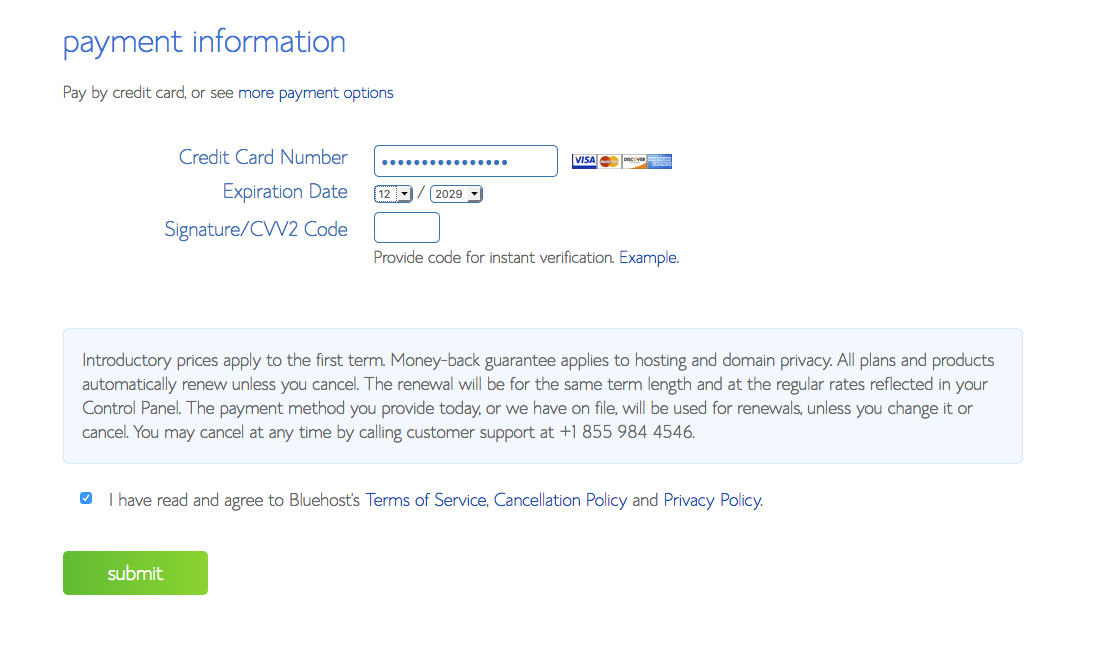
Enter your Billing Information here and make sure you click on “Confirm” checkbox and submit your request.
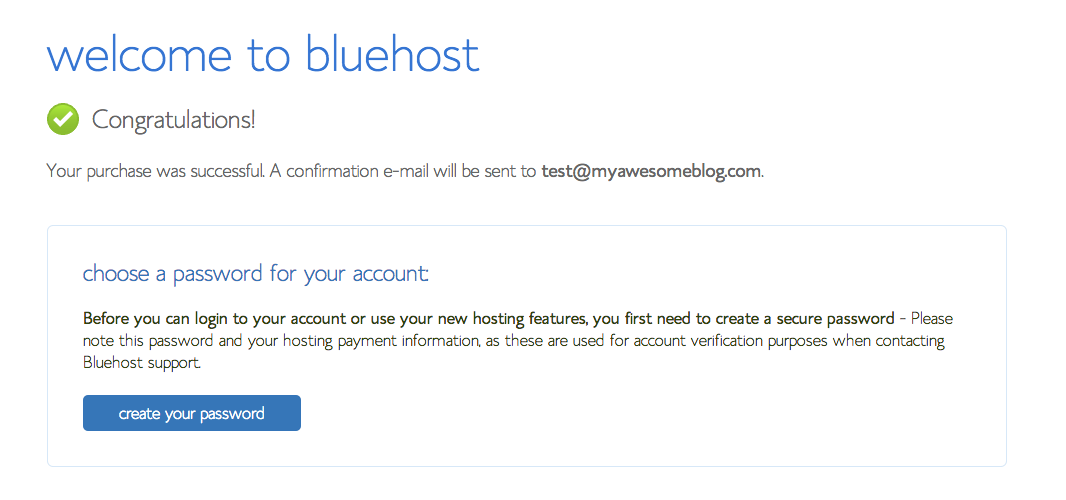
Upon successful payment, you will see below screen. Please make sure you check your email and confirm all the details as soon as possible. If you see any issues, please contact Bluehost Support. Make sure you choose the password for your account and store it at the safe place.
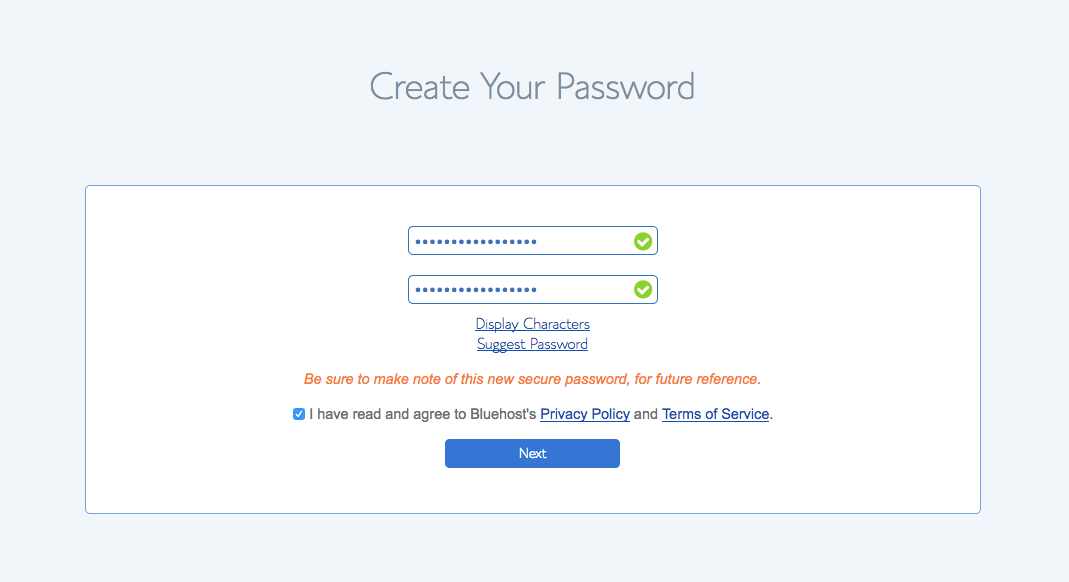
Set your password and confirm it. If you don’t think of any strong password then you can use the password generator to generate a strong password. But if you use that, make sure you save it somewhere for future reference.
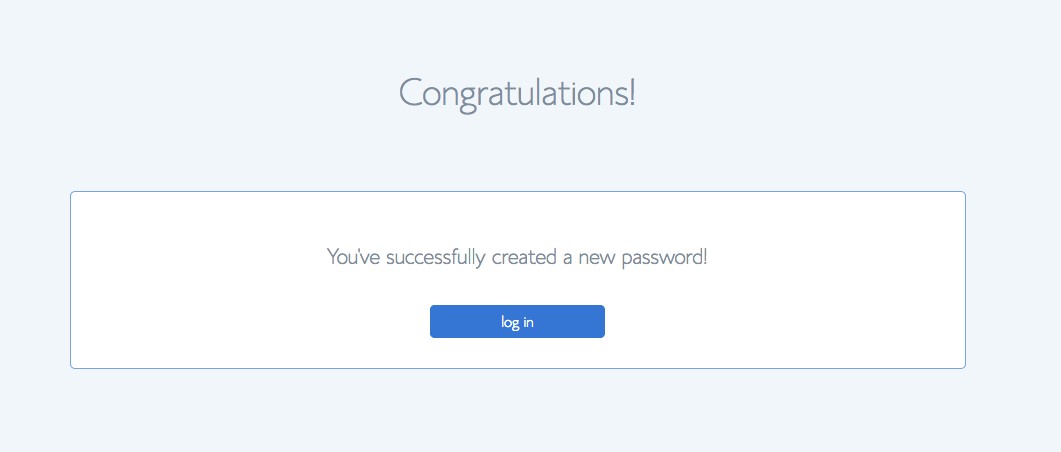
Login to Bluehost C-Panel using the username and password you have used during the signup process.
 Bluehost has made your life simple. Now you don’t need to install WordPress on your hosting account. They will take care that for your and will automatically install the WordPress.
Next, you need is picking up a theme for your WordPress Website and then you are all set to launch your blogging journey.
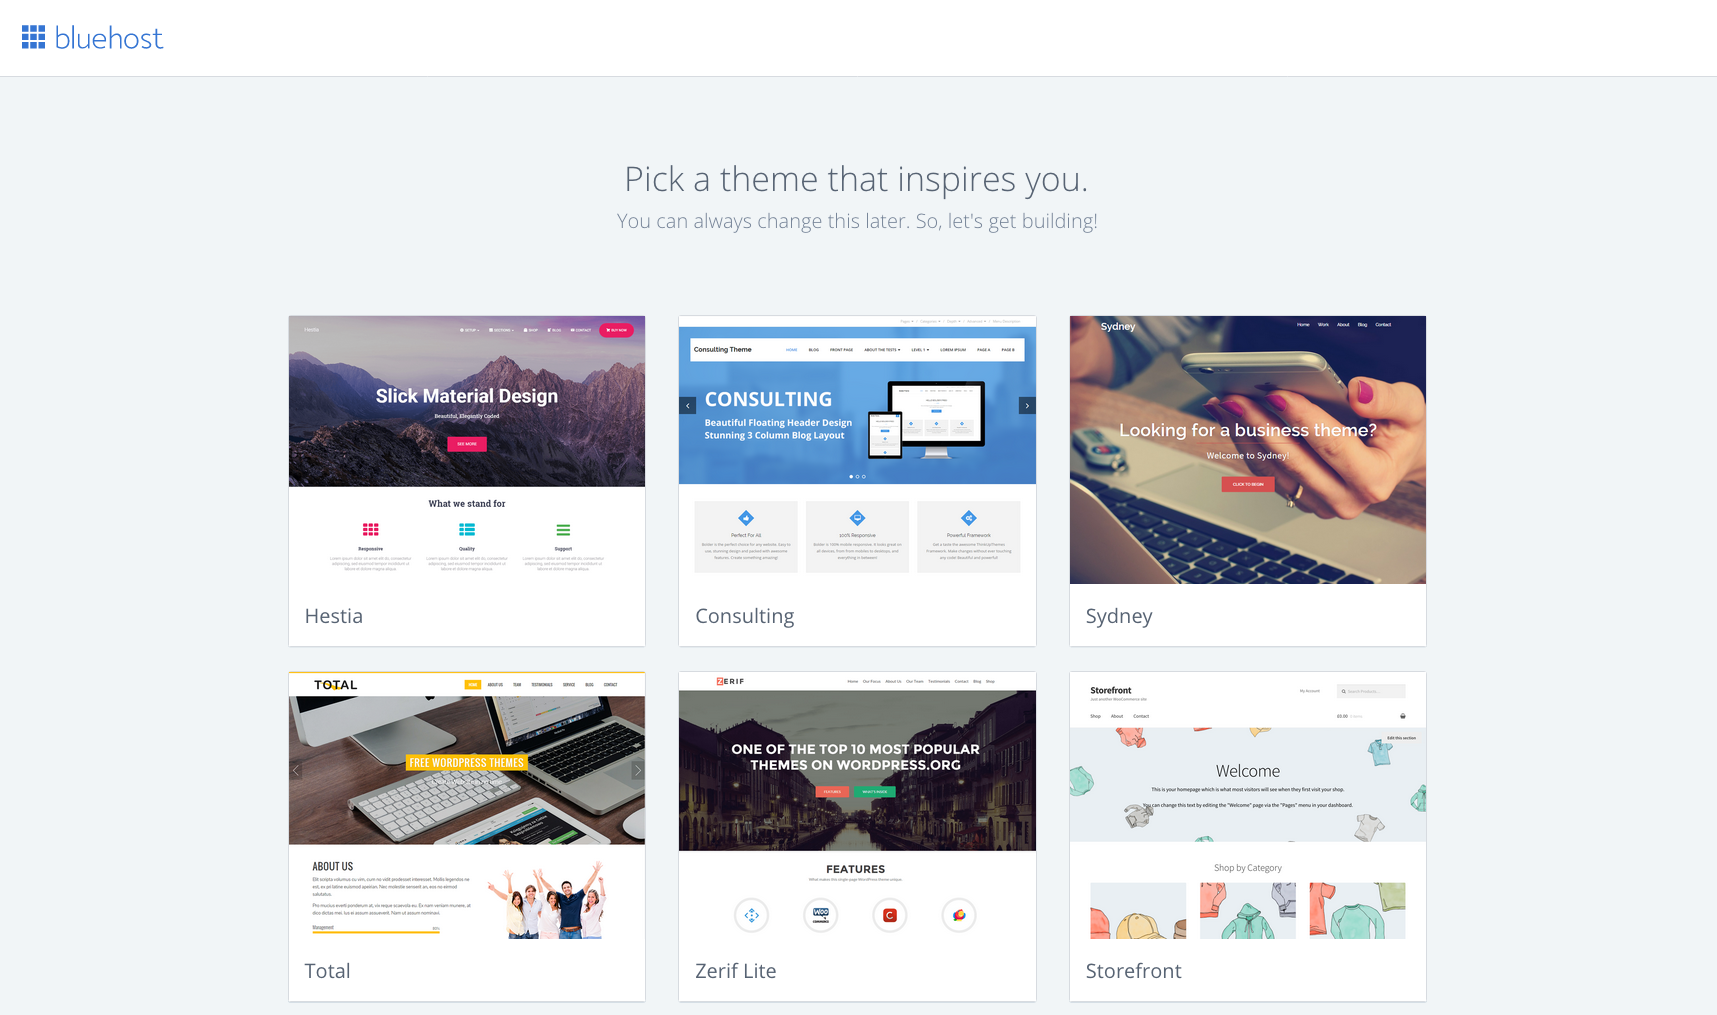
Click on the “Start Building” that that will take care of your WordPress installation on your registered domain.
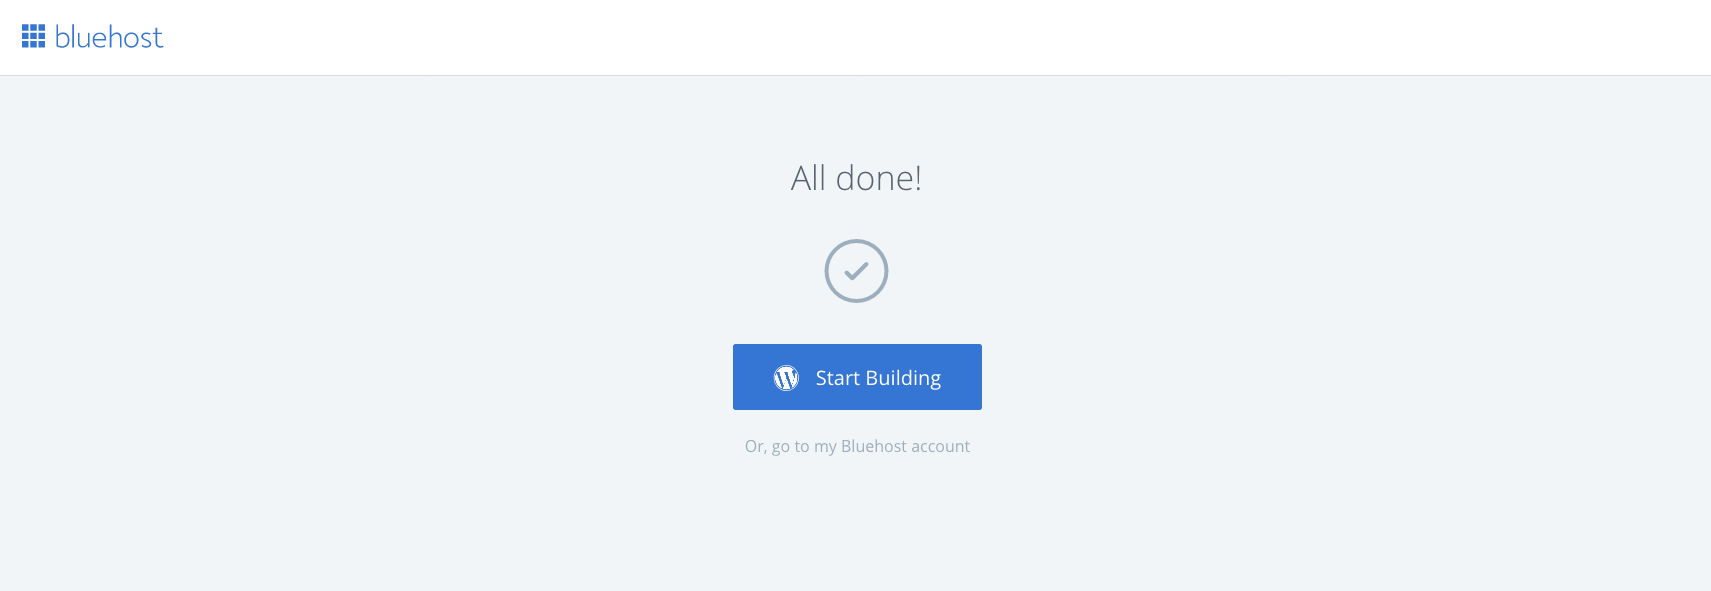
That is it! Welcome to WordPress Dashboard. Now you see the admin area of your website and start customizing it as per your need.
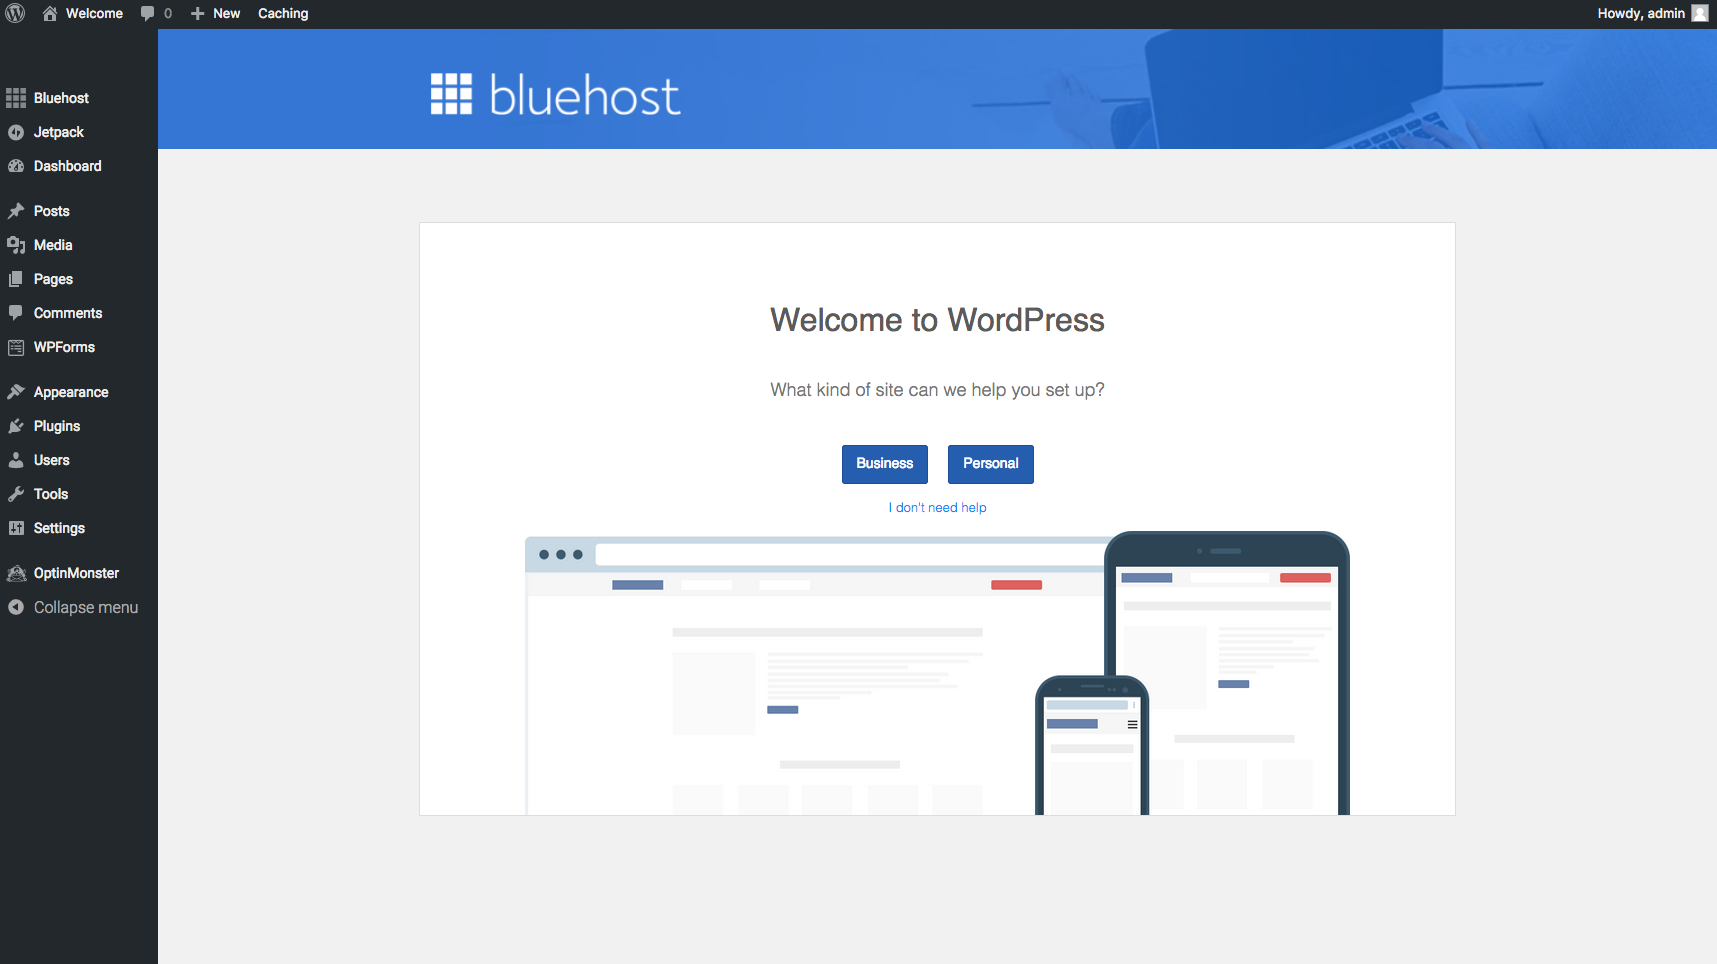
Bluehost Tools For Your Blog
In your WordPress Dashboard, you have the option to writing content for your website, designing, traffic etc. You can explore more Bluehost tools/options in your WordPress Dashboard now.
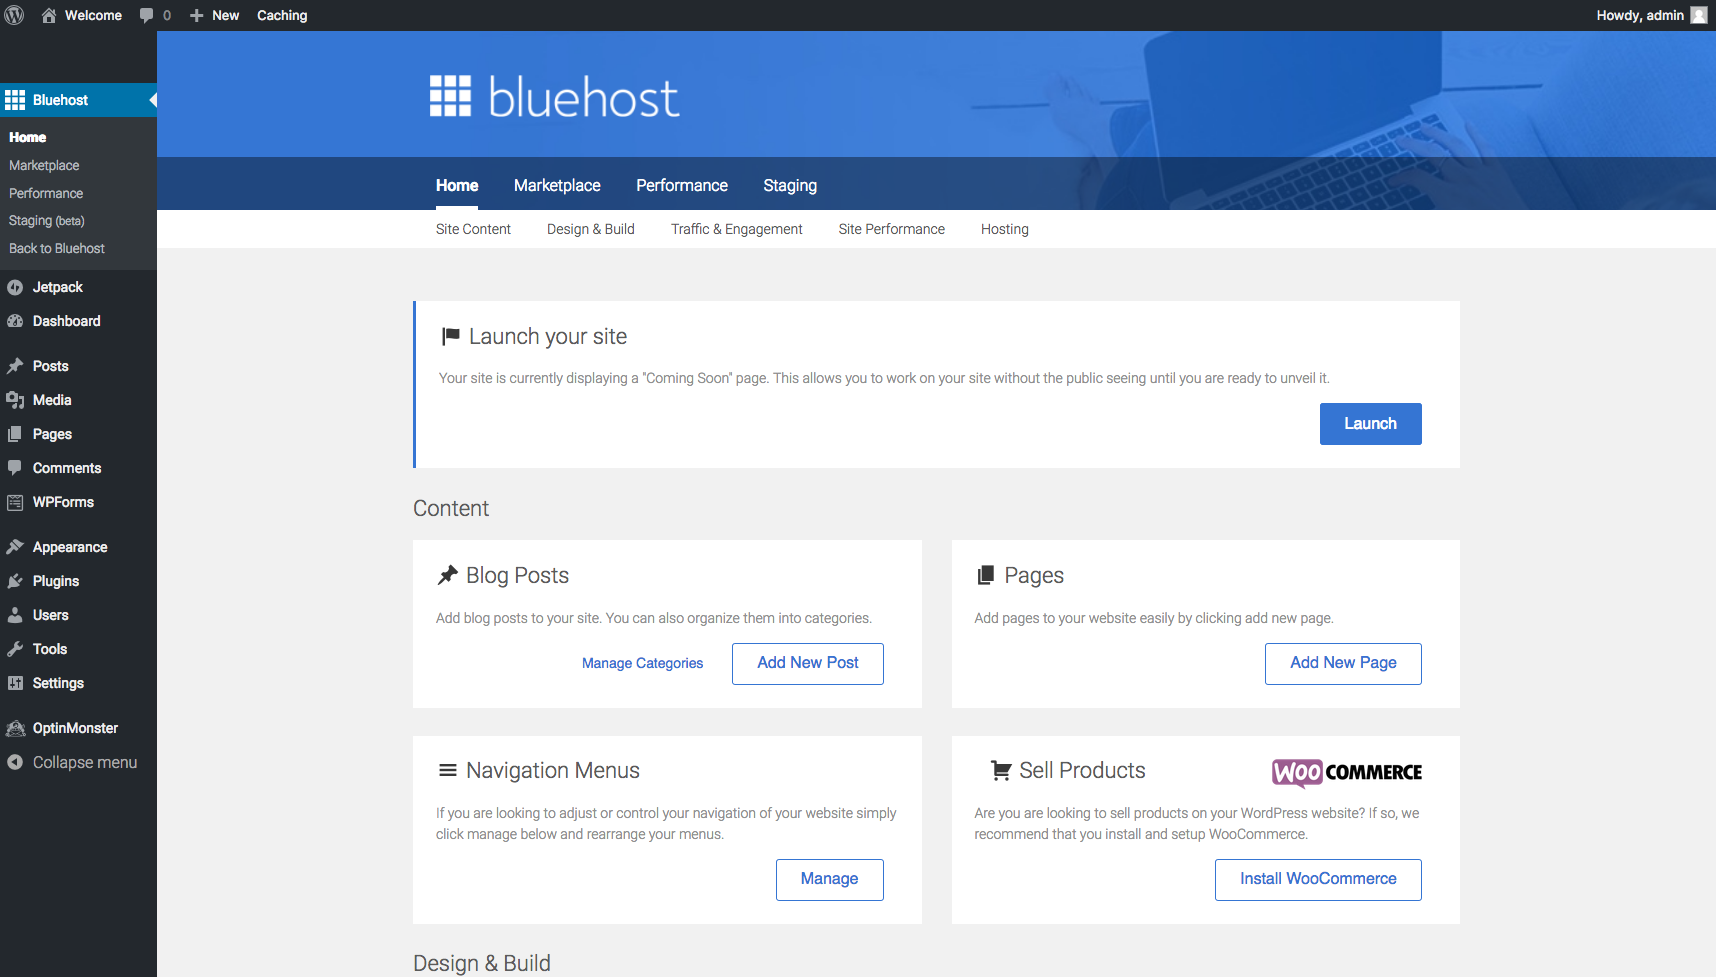
Next step is to Launch your website. So, click on Launch button and bring it LIVE.
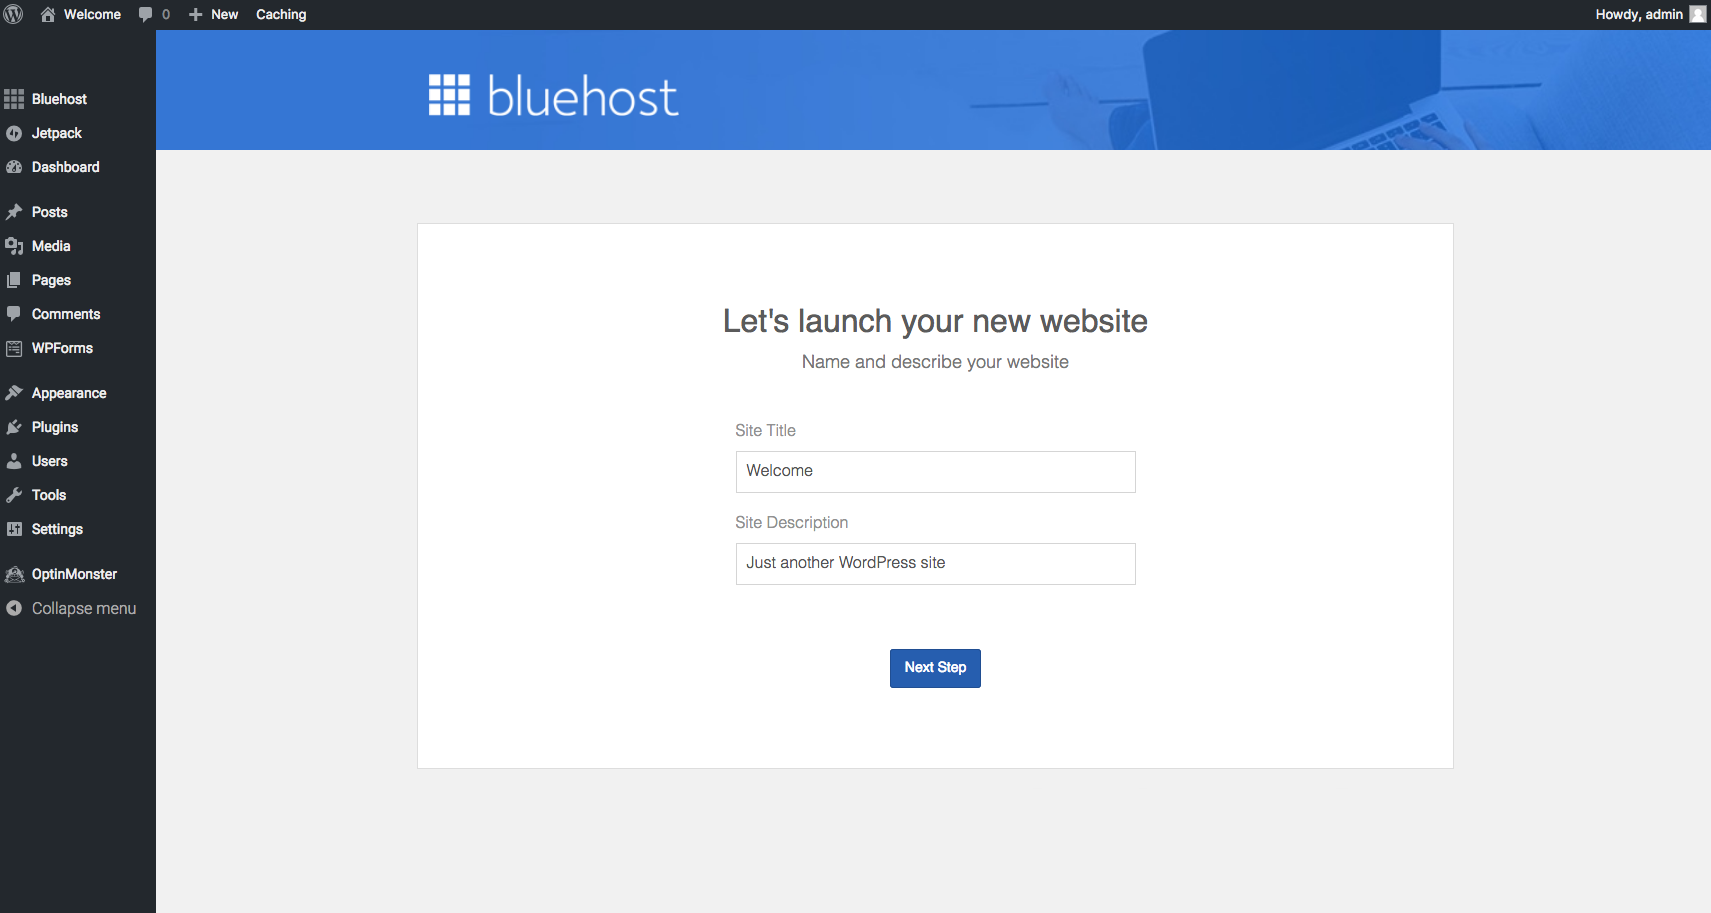
You can access your “Bluehost C-Panel” from here – Bluehost C-Panel.
This new improved C-Panel will help you manage your WordPress website easily with self-explanatory options.
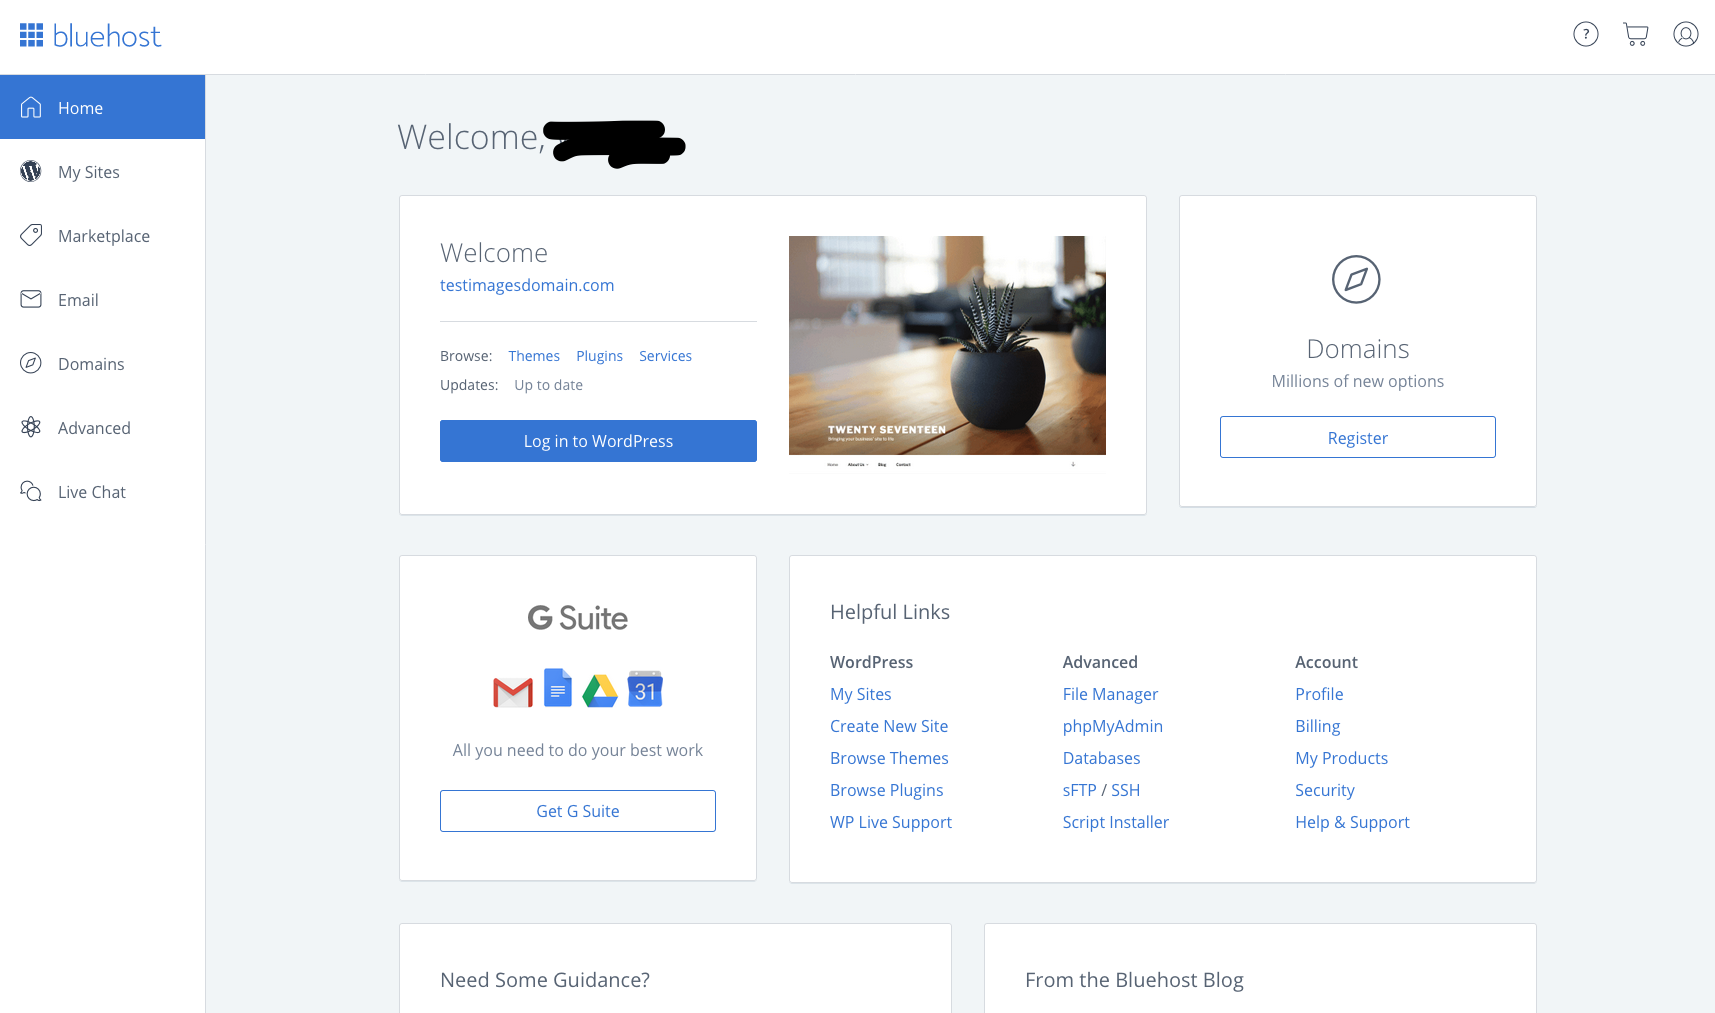
Congratulations!! You finally have your blog up and running on WordPress.
Step 4: Configure and Design Your Blog
At this point, you officially have your own blog on WordPress! WOOHOO! You will have to work on the designing and producing high-quality content, of course. I have an awesome E-book that I want to share with you to configure and design your blog and look like a professional in few hours. I have listed down all the plugins that you need to install at this point to make your blog up and running smoothly. There are some basic and pro settings that are required to setup correctly at the time you first log in to your WordPress Account. Please download the ebook from here – WordPress Blog Setup Guide For Beginners
WordPress Themes For a New Website:
1. Amazon Affiliate Store Review Blog – Download
2. Product Review Blog – Download
3. Envato Market – Get Best WordPress Themes
Step 5: Start creating useful content that serves readers.
At this point, you have a domain name, web hosting, installed WordPress, have a theme installed and also completed the basic in-house activities(settings) on your WordPress blog. But as a blogger, your main job is to feed valuable content to readers who will come to your website in a search of some helpful information.
If you ask me what should I write, then I can’t tell you because I am not sure what is the niche you have chosen as a blogger. But as a blogger, I can tell you to start writing on few things that are the must for the blog. There are two types of content you are able to create on WordPress i.e. Pages and Posts.
Pages –
Pages are the static pages on your blog that won’t really change. You can link these pages in your blog menu or provide the link to these pages in your posts. For example, this is a page on my blog. “About Me”. You can also start writing an “About Me” page for your blog as it is one of the very important pages that every blogger should make for their blog.
Posts –
Posts are a little different and what you’ll spend most of your time creating as a blogger – they’re where you create your regular blog posts. Posts will appear on the front page of your blog once they’re published. They usually have comments and a date to show readers when it was published.
Also, check out some of these articles –
- How to Make Money Blogging?
- Google Adsense
- How to Verify your blog on Pinterest?
- How to code robots.txt file for my WordPress blog? Beginners Guide.
- How to find WordPress Page ID to block it from indexing in Google?
- How to import a Post from an MS Word Document to WordPress post?
- How to Add more authors to my WordPress blog?
- How to open WordPress menu item in a new tab or window?
Have you Started a blog?
If you have started a blogging website using this tutorial then I’d love to hear from you in comments below. Please let me know which blog you have started and whether you found this guide useful? I’d like to hear your feedback know how I can improve this guide to make it more useful for others?
If you find it useful, please share with your family and friends to encourage them to start a blog and make themselves known for something they know better than others.
[mailmunch-form id=”356871″]




Pingback: 5 Tips To Start A Personal Development Blog In 2018
Pingback: HostGator Coupons Codes | DH
Everything is clearly defined about how to start a blog with the help of Bluehost starting from choosing a niche topic, sign-up process. hosting and domain set-up and adding useful resources to relevant content from the customer point of view all clearly mentioned in this content. I really recommend that every blogger should read this informative content.
Thanks, Harry for this amazing guide you have poured a lot of valuable information into this one. These types of guides will help a lot of people like me who are non-techie and don’t know a single code. Thanks for this amazing guide.
Regards
Suryakant
Thank you very much for sharing this article!